Hello gentle reader,
As you know Serenity is resplendent with teak wood; inside and out. The interior is beautiful and in decent shape, even though the sole(the floor) needs to be refreshed. That’s a HUGE job and we may not get around to it seeing as there are so many other projects to tackle.
Right now I’m spending time getting the exterior teak refinished since that experiences much greater degradation than the protected interior does. When Tim and I started working on the exterior teak we decided only the teak residing on the coach roof, the cockpit coaming, and the wheel would get varnished. We didn’t want to spend inordinate amounts of time on varnishing projects, and since you have to practically hang over the side to do the rub rail and cap rail we decided to use SEMCO on those areas.
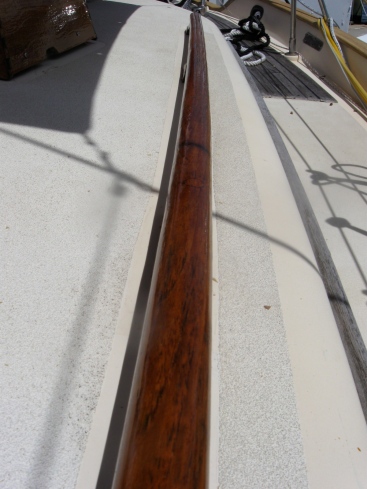
The rub rail and cap rail we worked on first. We stripped off the varnish(how I do that is below) and use a product called SEMCO – http://semcoteakproducts.com/ I started out using a foam brush for the SEMCO but that was a huge pain in the ass since the stuff is thin so would run down the sides and stain the topsides. No bueno! Also, with the brutal sun here in Florida I have to clean the teak and apply the SEMCO every month. ARG! I finally used my noggin and switched to the ole sock method to apply the SEMCO. I just dip the sock into the SEMCO then rub in. Once I switched to The Sock Method my life got a whole lot easier. I store the SEMCO sock in an airtight container, and I also use the dinghy now when SEMCO’ing versus hanging over the side. Saved my back and knees for sure.
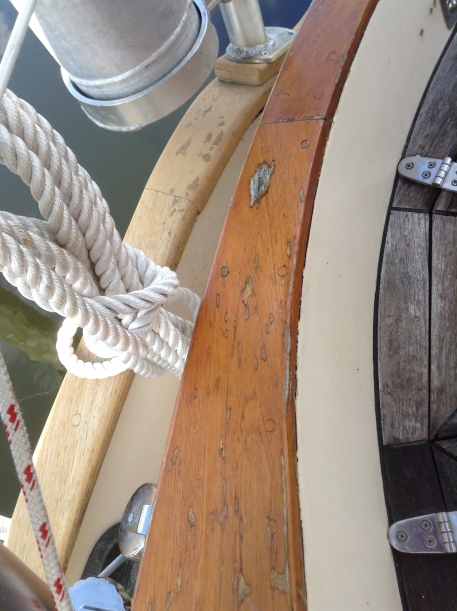
Here are some before pics of the cap rail, and the cool Tayana scroll work on the sides:

The black tape is covering up a hole used by the arch. Tayana scroll work hidden by old and crusty varnish.
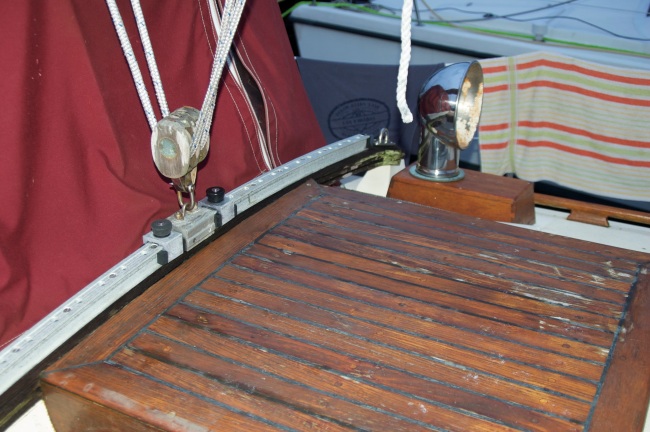
For varnishing the sea hood and hand rails I used foam brushes because they are cheap and after 2 uses I would just throw away. I was leery of using a good brush since varnish is oil based and making sure the brush is properly cleaned and didn’t dry out and get ruined I didn’t know exactly how I would do that. I shouldn’t have been worried. Once I switched to using a brush it now takes me half the time as when I was working with a foam brush, plus the end results are better. Live and learn.
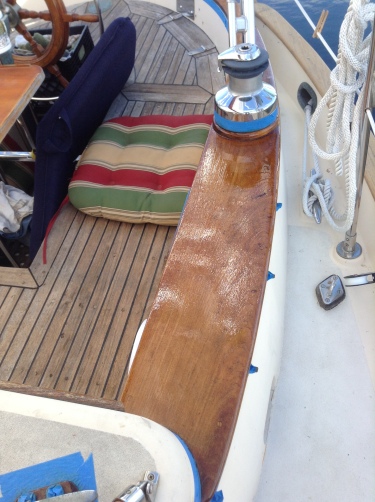
For the coaming Tim and I removed the bimini frame since we need a new bimini and dodger anyway, and I wanted the coaming patched up and ready to go, and of course there were a half dozen of so bungs that needed replacing. For the coaming there were 2 spots that needed patching. Tim did one spot, and I worked on the one pictured above. That took a couple days chiseling away the old wood just so, then fitting in the new piece of wood. Tim brought up a good point which I will use in future teak patching projects: make the new piece of wood the size you want, then chisel to match the pieces’ size, versus trying to fit a new piece of wood into some odd sized square/divot. I’m not explaining it very well, but it will save me aggravation on the next patching project.
Varnish removal:
I used a heat gun and different sized scrapers. It pays to be patient and develop a rhythm when scraping. I also found that being upwind of the heat gun was a smart thing to do since by 9am the temps were already in the 80’s and rising. The scrapers I used I ordered from Amazon; a set made by Allway. It has the scraper tool and 6 different scraper “blades”. Just have to be careful with the heat gun as on a few different occasions I melted the plastic scraper – oooops! Nothing some epoxy couldn’t fix… I also found when working in tight spots and around curved surfaces using the scraper blade by hand – wearing gloves! – was the easiest method. That helped me control where the blade was going, and some spots were just too tight for the scraper tool to fit.
Once all the varnish was vamoosed I used a white ScotchBrite and Ajax on wet wood, then gave it a LIGHT scrubbing, careful not to let the Ajax dry on the wood. The acid in the Ajax helped get rid of any gray spots and cleaned up the wood very nicely. I thoroughly rinsed off the Ajax then toweled off the standing water.
The next day I lightly sanded with 120 sandpaper. Due to neglect there are ridges in much of the wood so I didn’t try to sand the ridges out; I was just sanding for smoothness. I thoroughly washed the dust off with water, then wiped up the standing water. I found a tack cloth just got gummed up with all the residue and also seemed to leave a sticky residue on the wood. I know they aren’t supposed to, so maybe I imagined it.
Here are the tools and products used for varnishing:
– 2 1/2″ Corona “Europa” brush – http://www.coronabrushes.com/corona/index.cfm?event=showProduct&id=346&seriesId=16
– Crown Low Odor Mineral Spirits
– Epifanes woodfinish gloss – first 4 coats.
– Epifanes high gloss clear varnish – remaining 6 coats.
– 2 16oz, washed out Bush’s Baked Beans cans. One for the mineral spirits for brush cleaning, and the other for the varnish. Extra varnish I put back in the Epifanes can, not stored in the Bush’s can. The mineral spirits seemed to survive okay in the can; with a tight seal of heavy duty foil. I mention these cans because they have ridges on the sides and through trial and error I could do a decent job of pouring out just the right amount of varnish. Plus they are easy to handle and with a wide opening the brush bristles didn’t get caught on the sides.
– Old t-shirts for drying brush post-cleaning.
– Nitrile gloves.
– Couple paper towels for any spills/drips.
– 3M 220 sandpaper.
– Brush storage: cleaned well with mineral spirits, using the old t-shirt to get most of the spirits out of the bristles. When the bristles were damp to the touch that’s when I wrapped the brush in heavy duty foil, then stored in ZIPLOC baggie, squishing the air out of the ZIPLOC.
The woodfinish gloss does not require sanding in between coats so the next morning I would just wipe off the wood with a damp cloth and get to varnishing.
When putting on the high gloss varnish light sanding was required. The instructions call for 280 or 320 but I used 220 VERY lightly. Also, any runs or drips I would sand down to lessen their visual impact. To get rid of the varnish dust I wiped with a damp cloth making sure to clean out the crevices. After wiping down I would drink my coffee, waiting for the wipe down to dry.
A note about the varnish: I prefer buying the small cans(.53 US quarts; 500 ml) versus the larger cans. I know it’s a little more expensive to go small, but the varnish in the smaller cans seems to keep fresher = not thicken as much as in the larger cans. I guess less air in the can to contend with.
Speaking of thickening varnish… I discovered using the cap for the mineral spirits helped me dole out small portions, thus easily thinning the varnish to the desired consistency.
Here are the varnished areas so far – Sea hood and hand rails. 3 more coats needed for the coaming and staysail traveler.
Thanks for reading!


Recent Comments