Author Archives: Sailing With Serenity

About Sailing With Serenity

1985, 37' Tayana sailboat. Living and floating in Bradenton, FL

First time at anchor

One of the milestones of owning a boat is the first time one spends overnight at anchor.  In my case this is a personal first; seeing as I’ve never spent the night at anchor on ANY boat.  For it to be the first time on a boat in which I am co-owner, double down on the awesomeness.  GO ME!!

Other than the pure fun and loveliness of being at anchor, this is also important from an operational aspect. We wanted to see how Serenity behaved on the hook, systems operations, battery life(this was pre-solar panels), anchoring; all that good stuff.

For the weeks leading up to Christmas Tim and I talked a lot about spending a night at anchor.  He had 2 weeks off work during the holidaze so what about spending Baby Jesus Day at anchor?  We chatted with our new friends on Lost Cat, Matt and Kari, about going out.  They’re all about being at anchor so they were happy to shag ass.

We – and by we I mean Tim and Matt – determined Christmas Day would indeed be ideal.  Boat traffic on the river would be light, a nice breeze was forecast so we could actually sail and not motor the whole time, temps ideal(70’s as the high, low in the 60’s), rain chance slim to none.  Christmas Day it shall be.  Great, now what to do about the anchor.

Since we currently do not have a windlass on Serenity being on the hook needed some logistical consideration.  Wait, what exactly is a windlass?  There are 2 types – mechanical or electrical.  They are situated on the bow and their purpose is to raise and lower the anchor in a civilized fashion.  Mechanical, you use arm power to winch that baby up.  Electrical has a motor so you push a button and it does the heavy lifting in raising the anchor.  (Yes, we are planning on a windlass, but we gotta give the bow pulpit and bow sprit some TLC first.)

Of course you can raise and lower the anchor old school – via muscle power, hand over hand – and in our case we have a giant honkin’ Mason Ray 66# and to get that thing on board, tucked away and secured you better be in a We wanna pump, YOU up! frame of mind.  Needless to say, Tim is on anchor duty until the windlass comes to town.

Okay, so Christmas Day dawns beautiful and balmy.  We palaver with Matt and Kari and we decide to get outta the marina first and they’ll catch up.  We hit the river.  I think we see only one other sailboat waaaaayyyy ahead of us.  Ah, there are Matt and Kari, behind us about 1/2 mile.  Doopie doopie doo.  We’re motoring up the river.  It’s nice and quiet.  Serenity is going along nicely.  Cool, the wind is out of the Southwest.  Awright, time to raise the sail!

Since I’m the swabbie of this crew I raise the sail.  Good upper body workout!  We sail into Tampa Bay, and yes, it was awesome!  In the other post I talk about weather helm and Serenity steering herself, which she did admirably.  You could let go of the wheel and Serenity was well balanced and tracking perfectly on course.  I know this won’t happen all the time, but it did this time, and it was fantastic.

Now I’m at the wheel and I have my eyes peeled for crab trap buoy’s.  I spot something different.  Fins?  What’s that weird black splotch on the top of the water?  I call to Tim to check it out.  There!  Are those fins?  We stare and stare and stare.  YES!  Porpoises!!  YAY!!

The scout duo comes over to Serenity.  I guess they deem us safe and swim with us.  What the hell is that?  The things I spotted earlier by the black splotch were indeed fins.  There’s a whole pod of porpoises!  And they’re coming our way!  Holy guacamole, some are hanging out with us!

By now I’m hopping around and squealing like a six year old.  I scramble to find the iPad, barking at Tim the whole time because I can’t find it, because he’s stowed it in a(to me) random secure spot.  Through the hull I can hear the porpoises chatting with one another.  WHERE’S THE DAMN IPAD???!!!  THEREITSFINALLY!  I scramble back on deck, certain they’ve gone away and I’m to suffer another porpoisey heartbreak.  Nope, they took pity on me and stuck around for some video action, which you can see here – https://www.youtube.com/watch?v=PFLa0UZZ5ks&feature=youtu.be  Go ahead, I’ll wait…

Porpoises!  Beyond description so awesome.  With that excitement done we consider our next move.  Sail to Gulfport?  Ummm, no. Because it’s kinda far and also being Christmas the town is probably shut down.  We get on the radio with Lost Cat.  How about anchoring at The Cross?  Also known as DeSoto Point.  Cool, sounds good.  We turn around and head to The Cross.  Tucked into the cove is Lost Cat, already anchored.

Lost Cat at anchor.

Lost Cat at anchor.

Tim consulted the GPS and noticed a sand bank to starboard of Lost Cat, resulting in 3ft. of water. No bueno.  So we circled a couple times and then dropped anchor.  Not the ginormous 66# Mason but our other one.   First try and the anchor holds perfectly.  Sweet.

Serenity at anchor

Serenity at anchor

Serenity at anchor, close up.

Serenity at anchor, close up.  Who stowed that main sail?  What a mess.

We dinghy over to Lost Cat and then all of us dinghy over to DeSoto Point.  We stretch our legs with a hike – actually more like a meander on the path – looking at the historical tidbits along the way.  We muck about on the beach for a bit, then dinghy back to our respective boats.

DeSoto Point - beachin' it, with cocktail of course.

DeSoto Point – beachin’ it, with cocktail of course.  Serenity in the background; the boat to the right.

Lost Cat at Anchor - Sunset.

Lost Cat at Anchor – Sunset.

By now the breeze is picking up a wee bit and we discuss dropping the Mason.  Tim gives a tug on the already set anchor.  Seems to be holding pretty well.  Let’s leave it.  We hang out a bit, then cook some dinner.  The sun is setting and we discuss some more about putting out the Mason.  Better safe than wishing we had done it.

Tim hauls up the smaller anchor, then tosses out the Mason.  I’m at the wheel, maneuvering Serenity in order to set the anchor properly.  So, by now we’ve scooted closer to the shore.  We eyeball the GPS.  Depth looks okay, but we need to be mindful we are now closer to land.

Night falls and time for bed.  The sounds of Serenity at anchor are similar, but different, than when we’re at the marina.  I sleep a grand total of I think 3 hours.  I prairie dogged via the companion way probably every hour; checking our location, making sure we’re not moving.  This, of course, is ridiculous.  The conditions are mild. The Mason is a brute and set very well.  Logically I know we are not moving but I was anxious none the less.  The night was beautiful, so it really wasn’t a hardship to be up and down during the night.  🙂  Tim also did a couple of checks, but being more experienced he wasn’t really concerned, just checking stuff out.  When we got up in the morning we realized the lighter anchor would have done a fine job since it had set very well.  Better safe than sorry, and I did NOT want my first experience at anchor to include dragging the anchor in the wee hours, running aground, or bumping into somebody.

December 26th.  Good morning!  It is beautiful and quiet and the slight breeze is refreshing.

Good morning!  With my blankie in the cockpit.

Good morning! With my blankie in the cockpit.

The sun, so bright!

Me the Lizard.  Yikes!  The sun, so bright!

The morning progresses with coffee and breakfast; eggs, bacon, toast.  Yum!  I don’t know about you, but bacon seems to taste better when at anchor/camping/out in the wilds.  The rest of the morning we fritter away lounging, reading, chatting, spying on people with our binocs.  Wonderful.

We putter over to Lost Cat to see what they’re up to.  They’ve already done some chores on their boat.  So productive our friends!  We skulk on Lost Cat for a bit, then decide to head home.  We need to time our departure from DeSoto Point so we may arrive at Twin Dolphin around 4pm, when it is slack tide.  No need to make docking harder by battling the current.

Tim would like to stay out for another night, but I want this first trip to be 100% successful, ending on a positive note.  Staying out another night feels like tempting fate, and we all know how that ends.

We make a game plan for raising the anchor, which involves me on standby to help hold the brute in place while Tim secures it.  Tim readies himself for hauling up the anchor.  I’m piloting, fingers crossed I don’t screw up.  I’m doing well until I decide to be fancy and reverse Serenity.  I can’t seem to figure out which way to steer.  ARG!  So I give up.  Better to learn another day than do it now, when it’s not required.

By now Tim has the anchor up and neatly tucked into place.  He is a CHAMPION, not needing my help at all.  Bonus points for him not herniating himself, crushing a toe, bleeding everywhere, or going head first into the water.  Bonus points for me for not running us aground or into the little boat that seemed oh so close.

Giddy with success I motor us away from DeSoto Point.  This is what happens when one plans.  No drama.  I don’t run into shit.  Tim doesn’t get hurt.  Win win.

We leisurely motor to the marina.  Tim takes the wheel as we make our approach.  Timing our arrival pays dividends as Tim eases Serenity into the slip.  A perfect 10 for nailing the landing.  We secure the lines, then a celebratory cocktail with Matt and Kari.

Now that we have solar panels(look for a blog about that) and experience manhandling the Mason the next trip is already being schemed.  I can’t wait.

Categories: Favorite places, Home | Leave a comment

New canvas and sail covers, a.k.a. The Prettification Continues


Progress on Serenity seems to be in fits and starts.  Seems like nothing happens for a couple months then BOOM, action!  The latest BIG project was the dodger and bimini.  For those non-swabbies reading the blog, basically the dodger and bimini are two separate entities – but connected – which provide protection(wind, sun, rain, snow(not for us!) for the cockpit area.

Our old dodger didn’t really fit right, the top bar interfered with the view forward when at the wheel, and the bimini part was pretty rag tag, plus we wanted sun screens so you could have protection from the sun, but get a nice breeze, which the original configuration was not suited.  Here’s a snapshot of the old dodger, bimini, and sail covers:

Old dodger& bimini

Old dodger and bimini

First off, deciding the color.  As everyone knows, a simple statement fraught with pressure and angst.  White, black, tan, yellow, orange; out.  How about Navy?  Classic, but ummmmm, no.  Hunter green?  Too bright.  I LOVE red but didn’t know how it would fade(splotchy?  pink?  weird?) plus it’s more expensive, red being a difficult color to dye consistently.  Purple?  If it was just me, and I was going for funkadelic, hells yes, but for Serenity, alas, no.  We perused a Sunbrella catalog and I spotted “Fern”.  I was immediately drawn to it, and kept coming back to it.  Why?  It’s an “earthy” color, reminding me of the spruce and pine found in mountain climes which I love, only second to the water.  The color also goes well with the cream color of the boat, it’s a tad on the lighter side so we thought it might be a little cooler during the summer(not so much so, as already discovered), and I thought when it faded it might not be so noticeable.  And last but not least, I haven’t seen another boat with the same color.  Ker-pow!

With the color decided we chose Island Nautical to do the stainless and canvas work.  They are based in St. Petersburg, FL and have a reputation for high quality work.  Are they expensive?  Yes.  However, in the end I feel we got a bargain considering all the work put in.  More on that below…

Interesting fact, St. Petersburg here in FL was co-founded by a guy named Peter Demens, who spent time in St. Petersburg, Russia and he loved the city, thus the town was named St. Petersburg.  That’s on a historical plaque in St. Pete, FL.  You’re welcome.

Back to the project…  We worked with Jim the Canvas Guy.  No, I don’t know his last name.  To me he’s Jim the Canvas Guy.   A few challenges facing Jim: how to get the dodger tall but not too tall = good sightlines but not so tall as to inadvertently be a wind catcher, easy ingress/egress from the cockpit, get the bimini to work with the arch(HUGE!), bimini tall enough we can stand under it without cricking our necks, boom to not hit the dodger/bimini frame, visual access points to the wind vane at the top of the mast, easy access to the dinghy and dinghy motor, and the most treacherous part of all… me standing there going “what about this”? On repeat about a dozen times.  For this project, brains and creative thinking required.

Yeah, Jim is a total rock star.  He came out numerous times, discussed with us, measured, pondered, measured again, discussed more with us, brought out the stainless guy, made patterns, more discussions; basically worked his BUTT off.   I cannot tell you the amount of hours Jim put into this project.  Stuff that looked good to us, he would go, umm, no, I don’t like that, lemme see how I can make it better.  It was all about form, function, AND looks.   The level of expertise, the quality of work, it was worth EVERY CENT.  I would like to think Jim enjoyed working on Serenity, stretching his brain to come up with elegant solutions to some sticky wickets.  In my opinion, the end product is near perfection; just short of a work of art.

Dodger assembly, just starting

Dodger assembly, just starting

Dodger assembly, further along.  Also, the boom looking nakid sans sail!

That’s Jim the Canvas Guy. Dodger assembly, further along. The main sail boom looking nekkid without the sail!

Dodger and bimini - done!

Dodger and bimini – done! Windows to keep tabs on the wind direction, plus let some light in. Ahhhh, sail back on. New sail cover – whoo hoo!!

Port side of dodger with sun shade affixed.

Starboard side of dodger with sun shade affixed. Center window rolled up, letting in a delicious East breeze.

View of mast through cockpit window.

View of mast through cockpit window.

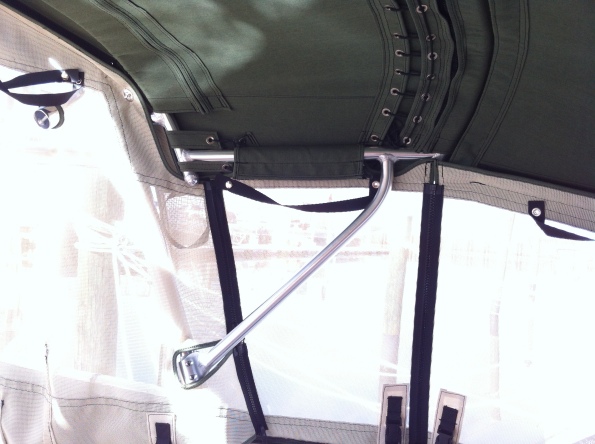
Strut for bimini.  The aluminum tubing arches over the cockpit and affixes to the other side.

Strut for bimini, affixed via brackets to the arch. Notice the lacing – bimini tubing runs through there, spanning the width of the cockpit.

Sun shade, zipped in.   The black ties hanging down, they snap the rolled up shade in place.

Sun shades, zipped in. The black straps hanging down, those are to secure the rolled up shades in place.

Aft view, canvas rolled up and open.

The very back of the cockpit. The long sun shades rolled up and secured.

Down and zipped up. Nice and cozy.

Here are a few close ups of the details:

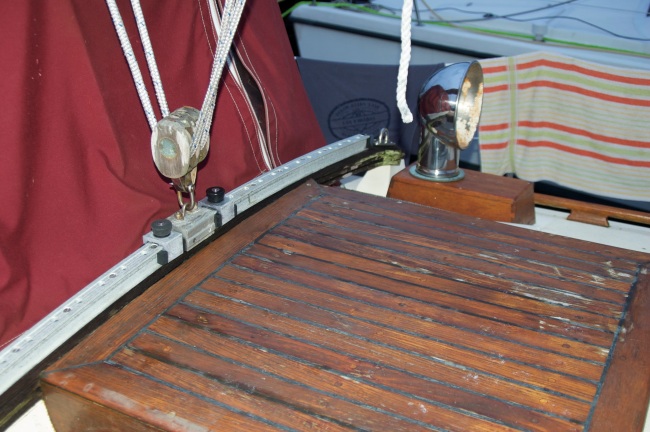
Track for dodger canvas. This is affixed to the cabin roof. We decided on track versus connectors(next pic) for a more secure fit, plus a little bit of water deflection.

Connector close up.  Many times these are used to affix the dodger canvas to the roof.  We decided on track instead.

Connector close up. Many times these are used to affix the dodger canvas to the roof. We decided on track instead.

Cut out in the window to accommodate the control line for the traveler.

Buckle detail. A total of 22 buckles used for keeping the sun shades down and secured to the railings.

Another important piece of this project was the shortening of the main sail boom, and with that the main sail. Many Tayana’s suffer from what’s called weather helm.  Basically what that means is the boat has a tendency to sashay itself into the wind.  It’s an annoyance since if you’re not paying attention next thing you know, forward progress has stalled and the sails are flapping.  The fix?  Shortening the boom by 18″.  Yikes.  That seems like a lot to me, however 18″ isn’t an arbitrary number.  Bob Perry, who is the designer of our boat(and many other wonderful boats), and other Tayana owners, using careful consideration and what I can only assume is math, landed upon 18″ being the ideal length to shorten. DISCLAIMER:  This is for a 37′ boat.  Other boat lengths, please consult a professional regarding shortening.

Some action pics of The Shortening happening:

Boom being shortened. Sawz-All is a magical tool. The thing dangling off the end? The reefing lines(utilized in dicey weather to reduce the size of the main sail when under sail), and the topping lift(the very end). When not under sail It holds up the heavy ass boom so it doesn’t smoosh your head.

The end cap being put back on. That’s Jim the Canvas Guy.

Ta-da! Shortened boom, with a better view of the topping lift.

So, after all this, we went sailing, on Christmas day, and the weather helm had 99.9% vanished.  Now Serenity practically drives herself.  Sweet.

The sail covers, dodger and bimini done.  Serenity in all her fern-y glory.  Life is good!

Serenity in her fern-y goodness.


Categories: Home, Projects | 1 Comment

Critters in the marina

A wee National Geographic moment in the marina when a big school of mullet came through.  Apparently they are mostly females and in the mood to spawn.  Who says romance is dead.

A video of the mullet romance can be found here – http://youtu.be/hwJTzY_sJoY

Enjoy!

Categories: Home | Leave a comment

Teak projects

Hello gentle reader,

As you know Serenity is resplendent with teak wood; inside and out.  The interior is beautiful and in decent shape, even though the sole(the floor) needs to be refreshed.  That’s a HUGE job and we may not get around to it seeing as there are so many other projects to tackle.

Right now I’m spending time getting the exterior teak refinished since that experiences much greater degradation than the protected interior does.  When Tim and I started working on the exterior teak we decided only the teak residing on the coach roof, the cockpit coaming, and the wheel would get varnished.  We didn’t want to spend inordinate amounts of time on varnishing projects, and since you have to practically hang over the side to do the rub rail and cap rail we decided to use SEMCO on those areas.

The rub rail and cap rail we worked on first.  We stripped off the varnish(how I do that is below) and use a product called SEMCO – http://semcoteakproducts.com/  I started out using a foam brush for the SEMCO but that was a huge pain in the ass since the stuff is thin so would run down the sides and stain the topsides.  No bueno!  Also, with the brutal sun here in Florida I have to clean the teak and apply the SEMCO every month.  ARG!  I finally used my noggin and switched to the ole sock method to apply the SEMCO.  I just dip the sock into the SEMCO then rub in.  Once I switched to The Sock Method my life got a whole lot easier.  I store the SEMCO sock in an airtight container, and I also use the dinghy now when SEMCO’ing versus hanging over the side.  Saved my back and knees for sure.

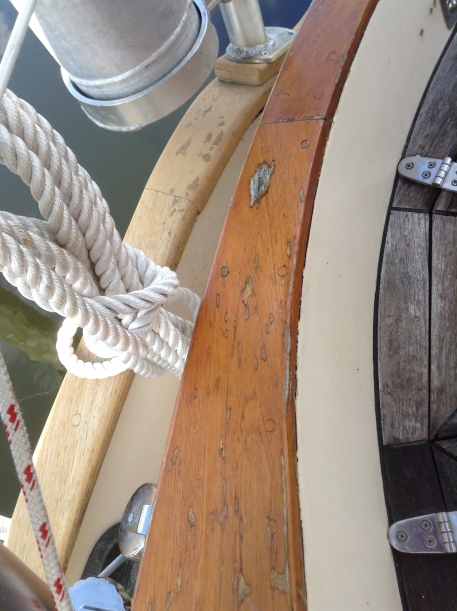
Here are some before pics of the cap rail, and the cool Tayana scroll work on the sides:

Caprail with old varnish and new bungs.

Caprail with old varnish and new bungs.

The black tape is covering up a hole.  Tayana scroll work hidden by old and crusty varnish.

The black tape is covering up a hole used by the arch. Tayana scroll work hidden by old and crusty varnish.

SEMCO'd scroll work

SEMCO’d scroll work.  I used a black Sharpie so the scroll work would pop.  🙂

For varnishing the sea hood and hand rails I used foam brushes because they are cheap and after 2 uses I would just throw away.  I was leery of using a good brush since varnish is oil based and making sure the brush is properly cleaned and didn’t dry out and get ruined I didn’t know exactly how I would do that.  I shouldn’t have been worried.  Once I switched to using a brush it now takes me half the time as when I was working with a foam brush, plus the end results are better.   Live and learn.

Sea hood, old varnish.

Sea hood, old varnish.

Handrail, old varnish

Handrail, old varnish

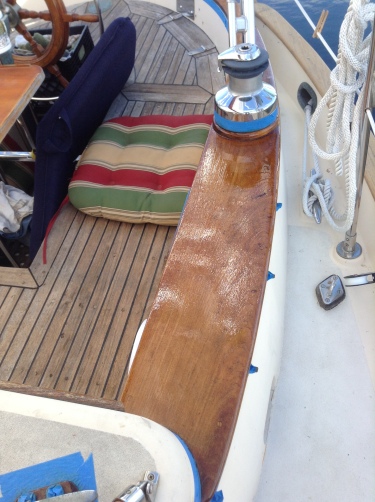
Coaming, old varnish and spot needing patching.

Coaming with old varnish and spot needing patching. In the background is the SEMCO’d cap rail.

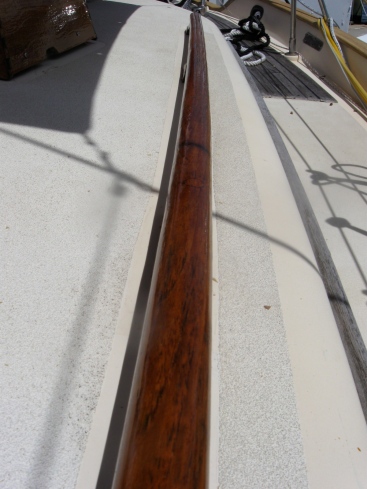
Staysail traveler, old varnish

Staysail traveler, old varnish

For the coaming Tim and I removed the bimini frame since we need a new bimini and dodger anyway, and I wanted the coaming patched up and ready to go, and of course there were a half dozen of so bungs that needed replacing.  For the coaming there were 2 spots that needed patching.  Tim did one spot, and I worked on the one pictured above.  That took a couple days chiseling away the old wood just so, then fitting in the new piece of wood.  Tim brought up a good point which I will use in future teak patching projects: make the new piece of wood the size you want, then chisel to match the pieces’ size, versus trying to fit a new piece of wood into some odd sized square/divot.  I’m not explaining it very well, but it will save me aggravation on the next patching project.

Varnish removal:

I used a heat gun and different sized scrapers.  It pays to be patient and develop a rhythm when scraping.  I also found that being upwind of the heat gun was a smart thing to do since by 9am the temps were already in the 80’s and rising. The scrapers I used I ordered from Amazon; a set made by Allway.  It has the scraper tool and 6 different scraper “blades”.  Just have to be careful with the heat gun as on a few different occasions I melted the plastic scraper – oooops!  Nothing some epoxy couldn’t fix…  I also found when working in tight spots and around curved surfaces using the scraper blade by hand – wearing gloves! – was the easiest method.  That helped me control where the blade was going, and some spots were just too tight for the scraper tool to fit.

Once all the varnish was vamoosed I used a white ScotchBrite and Ajax on wet wood, then gave it a LIGHT scrubbing, careful not to let the Ajax dry on the wood.  The acid in the Ajax helped get rid of any gray spots and cleaned up the wood very nicely.  I thoroughly rinsed off the Ajax then toweled off the standing water.

The next day I lightly sanded with 120 sandpaper.  Due to neglect there are ridges in much of the wood so I didn’t try to sand the ridges out; I was just sanding for smoothness.  I thoroughly washed the dust off with water, then wiped up the standing water.  I found a tack cloth just got gummed up with all the residue and also seemed to leave a sticky residue on the wood.  I know they aren’t supposed to, so maybe I imagined it.

The coaming, ready for 1st coat of varnish.

The coaming, ready for 1st coat of varnish.

Here are the tools and products used for varnishing:

– 2 1/2″ Corona “Europa” brush – http://www.coronabrushes.com/corona/index.cfm?event=showProduct&id=346&seriesId=16

– Crown Low Odor Mineral Spirits

– Epifanes woodfinish gloss – first 4 coats.

– Epifanes high gloss clear varnish – remaining 6 coats.

– 2 16oz, washed out Bush’s Baked Beans cans.  One for the mineral spirits for brush cleaning, and the other for the varnish.  Extra varnish I put back in the Epifanes can, not stored in the Bush’s can.  The mineral spirits seemed to survive okay in the can; with a tight seal of heavy duty foil.  I mention these cans because they have ridges on the sides and through trial and error I could do a decent job of pouring out just the right amount of varnish.  Plus they are easy to handle and with a wide opening the brush bristles didn’t get caught on the sides.

– Old t-shirts for drying brush post-cleaning.

– Nitrile gloves.

– Couple paper towels for any spills/drips.

– 3M 220 sandpaper.

– Brush storage: cleaned well with mineral spirits, using the old t-shirt to get most of the spirits out of the bristles.  When the bristles were damp to the touch that’s when I wrapped the brush in heavy duty foil, then stored in ZIPLOC baggie, squishing the air out of the ZIPLOC.

The woodfinish gloss does not require sanding in between coats so the next morning I would just wipe off the wood with a damp cloth and get to varnishing.

When putting on the high gloss varnish light sanding was required.  The instructions call for 280 or 320 but I used 220 VERY lightly. Also, any runs or drips I would sand down to lessen their visual impact. To get rid of the varnish dust I wiped with a damp cloth making sure to clean out the crevices.  After wiping down I would drink my coffee, waiting for the wipe down to dry.

A note about the varnish: I prefer buying the small cans(.53 US quarts; 500 ml) versus the larger cans. I know it’s a little more expensive to go small, but the varnish in the smaller cans seems to keep fresher = not thicken as much as in the larger cans. I guess less air in the can to contend with.

Speaking of thickening varnish… I discovered using the cap for the mineral spirits helped me dole out small portions, thus easily thinning the varnish to the desired consistency.

Here are the varnished areas so far – Sea hood and hand rails.  3 more coats needed for the coaming and staysail traveler.

Varnished sea hood.  Pretty pretty!

Varnished sea hood. Pretty pretty!

Varnished Handrail

Varnished Handrail

Coaming with 7 coats.

Coaming with 7 coats.

Staysail traveler, 7 coats

Staysail traveler, 7 coats

Thanks for reading!

Categories: Home, Projects | Leave a comment

Let me digress for a moment….

This blog has, in so far, been about the projects, and the trials and tribulations of working on Serenity, however I want to share something that isn’t about that; not directly.

Today I was working on replacing a busted lightswitch in the shower.  This for me is a simple thing, take out the old switch and put in the new one.

As I was working I got to thinking about the skill sets I possess. They aren’t very evolved – not like a master plumber, carpenter, electrician, boatwright, etc… – but the fact I know how to use a solder gun, how to strip a wire, paint, hammer, use a Skil saw, know how to measure(Tim, don’t laugh), familiar with tools and their uses, and a few other handyman things, I find myself incredibly grateful.

See, my Dad taught me these things.  No, don’t go awwwww.  This isn’t a memorial to him.  He’s very much alive and kicking; sharp as a tack and probably drinking some sour mash as I write this.

He wasn’t sitting there and saying this does this, do it this way, blah blah, but my Dad let me hang around and be his helper monkey when he was working on stuff.  He also took me with him to the hardware store when we spent our summers in Colorado.  To this day I can wander around Lowes or Home Depot, looking at stuff, touching the tools and products, and be happy as a clam in sand.  Without me knowing it I absorbed a LOT of knowledge.  And some pretty decent problem solving skills to boot.

When I would work on my own things, like my skateboard or dirt bike, he came around and asked me questions or just observed.  He never tried to take over, or make comments that would lead me to believe I was doing it wrong, or try to rescue me if I ran into a snag.  He was just there, available if needed.  I was a Grade A moron that I never took him up on his offer of help.

So, I offer up this piece of chick wisdom to all Dad’s out there with daughters, and even sons.  Let them hang out with you as you do projects.  Answer their questions, no matter how dumb.  Have them be your helper monkey.  Have Father/Daughter time at the hardware store.  This is INVALUABLE knowledge they will carry with them for the rest of their lives.  They will be more confident, able to fix their own toilet, hang a picture, paint a room, not be worthless when building sets for their high school drama class; the list goes on and on.

My sister, pretty much the opposite of me, she knows this stuff too, and believe you me, she uses it like I do.  Well, maybe not to replace a switch in a shower on a boat, but you know what I mean.

Dad – I love you to pieces.  You are my hero.

Christine

Categories: About, Home | 1 Comment

The Traveler

I’ve been meaning to write this blog for a while because this was the first major project we undertook in which we didn’t have someone do it 100% for us.  The Traveler.

In a nutshell the traveler is what allows the mail sail boom to be situated to accommodate the wind direction, plus you can control tension on the boom so it does not swing willy nilly when sailing.  The traveler and the respective parts experience tremendous forces so we didn’t want to skimp here.  Needless to say the sad state of the original traveler would just not do.

Top pic: The old traveler Support Post Side view of traveler - old & busted

Top pic:
The original traveler – the metal thing spanning the front of the sea hood.
Original support post
Side view of traveler – old & busted

There are quite a few ways to set up a traveler and originally on Serenity it was via 4 beefy posts bolted through the deck, with a teak “bridge” spanning the posts, then the traveler is bolted to the teak bridge. Other boats have no bridge; just support posts just at the ends, with arm thingies for added support and bolting to the traveler.  We decided to keep the original bridge configuration because of how our sea hood fits, and because most likely we will affix the dodger to the aft facing part of the bridge.

The original bolts for the support posts didn’t come through the headliner = not visible inside, however we were able to access all the nut ends of the bolts via inside the boat.  Inside the boat we removed the teak beauty strips(used to hide the headliner seams), plus one little triangle of teak, then carefully bent back the headliner and pow, there were the nuts. EZ PZ to now unbolt.  We had some trepidation when we removed the original bolts for the support posts because we didn’t know what we’d encounter; rotten wood, rusted bolts, or what.  We were very pleasantly surprised there was none of the above.  Tim filled in the holes with thickened epoxy and we were ready for the installation.

We enlisted the help of a local rigger Mac.  Mac came out, measured, discussed options, measured again then went on his way to get the mahogany bridge started.  We had already decided on the Garhauer MT-2 CT-TP traveler and heavy duty risers.  Tim also picked up 9, 60-13 single blocks.  Shiny, beefy monsters. I heart them.

New blocks.  Yeah baby.

New blocks. Yeah baby.

After a 6 week delay because some dicksack stole the traveler from Mac’s truck, all parts finally arrived. Mac, his assistant James, and Tim get to it.  After palavering about clearances, placement of the risers, and other sundry stuff holes were drilled in the roof.  Holes in boats.  Yipes.

We decided to do the bolts all the way through versus just through the core as per the original traveler = the nuts/bolts hidden by the headliner in the inside  As much for ease of installation and also to be able to inspect the plates for leaks.

The starboard side went in no problem, bolting in very nicely.  We decided not to cut the teak beauty strip. It’s just too pretty.

SAMSUNG

Starboard side backing plate; located over the galley.

The port side was a different matter.  See, the solid teak door for the quarterberth has zero clearance with the ceiling when fully opened.  Due to the curvature of the ceiling it has about 1/8″ to 1/4″ clearance when swinging shut.  Cutting the door to accommodate the bolts was absolutely not an option, which was expressed to Mac and Tim in no uncertain terms.  Bless their hearts.  Luckily only 1 bolt was too long so Tim figured it out; just hack saw off the extra length and use a regular nut.  The nut/bolt doesn’t interfere with the door, and is door is still beautiful since no chunk was removed from it.  Win win my friends.

Port side backing plate.  Notice bolt in lower right is shorter to accommodate the door.

Port side backing plate. Notice bolt in lower right is shorter to accommodate the door.

TA-DA!  The new traveler.  Works like a charm!

New traveler and varnished mahogany bridge.

New traveler and varnished mahogany bridge.

Categories: About, Home, Projects | Leave a comment

In Florida, for reals!

Hello readers,

Good News!  We have not fallen off the face of the Earth.  More good news!  I’m now permanently in Florida.  *HAPPY DANCE!*

Beginning of August Tim and I road tripped back to FL in my 4Runner.  All of my possessions had been pared down to a suitcase of clothes, 1 hanging clothes thingy, my scuba BC, a few small(ish) plastic bins with assorted stuff, and 4 ZIPLOC vacuum bags with jeans and winter clothes = will be stored for months before needing, and of course snacks.  The purging of stuff I enjoyed.  I was pretty ruthless, using the hadn’t used it or worn it for 4 months rule then it got adios’d.

Back of 4Runner

Back of 4Runner

We decided to be leisurely on our way down, mostly via state highways like 98, 19, then popped over to Cedar Key to check it out.  We were kinda on the lookout for “old” Florida; Mom and Pop motels, divey beach bars, and no hoardes of humanity.  Well folks, that doesn’t really exist anymore, at least where we were.

The stretch, pretty much starting at Pensacola, along the coast, through Tallahassee is – with the exception of some national forests and wildlife areas – are condos, Starbucks, fast food, and resorts.  98, the section starting South of Tallahassee, then over on 19, that part really reminded me of East Texas.  Not very populated, small towns, homesteads on acres and acres with lush lawns, and homes tucked amongst the deep shade of tall trees.  I really liked that part since the rush rush rush of life was held at bay for a few hours.

We arrived in Bradenton Sunday afternoon and checked into the Hampton Inn.  Serenity was out of the water since she had been hauled out to have the shaft replaced – it was badly pitted thus tearing up the stuffing – the stuffing box re-packed and a new transponder for our new Garmin GPS installed.  YAY, new GPS!  No, I don’t know how to use it.  That’s going to take some practice and reading the manual.  :-/

After a wee issue with the keel leaking water(no biggie, really) Serenity was finally ready to go.  We trekked over and brought her back to the marina.  Side note:  it was crazy hot!  I’ve sweated less in a sauna.  Gross.  Anyway, Tim did a fine job of getting her into the slip and our friends John and Cathy helped us tie up.

A couple trips with the dock cart and all my junk is now on Serenity.  Is it stowed?  Er, not all of it.  We now need to go through Tim’s stuff and see what he wants to keep. I think my 4 month rule may not apply to him….

In conclusion, I miss my dog Tito Snack something terrible fierce but I’m super happy to finally be on the boat.  In my opinion living aboard is kinda like camping; in a really nice floating cabin. I wasn’t sure how fast I’d adapt to living aboard but after 2 weeks I was completely comfortable.  Kinda like I’d been here all along.


Categories: About, Home | Leave a comment

First sail!

So, I’m jumping ahead big time because there were a couple (big) projects that were accomplished before this moment, but I wanted to get this posted because, well, it’s just too darn exciting.

Serenity’s first sail!!  Sunday, March 30, 2014.  The weather all week had been, for lack of a better word, annoying: great one day, crappy and gloomy the next.  Saturday was breezy, but on and off showers kept us inside Serenity cleaning and stowing stuff, in hopes for a sail on Sunday.

The weather forecast on Sunday called for North winds, 15-20, with gusts up to 30.  We were digging the North direction, and while not adverse to vigorous sailing we needed it calmer for our first sail.  Tim checked the forecast again and the update showed winds calming around Noon/1pm. Sweet, maybe we would get a window to get out for a bit.

We asked our dock neighbor Randy if he would come out with us, and even though Randy is battling an extremely gimpy back, he agreed.  Thanks Randy!!  I’m the weak link in this whole endeavor so having Randy on board elevated both my and Tim’s comfort level.

12:30pm rolls around and we decide to go for it.  Randy hops on board, we cast off, and Tim takes her out of the boat parking, er, marina.

By now the wind has shifted to the West and we’re heading almost directly into it.  Not ideal, but hey, we’re out on the river and have the main up!

After wincing every time the main boom smacks into our newly re-installed arch(that is a whole other story and post), we decided to drop the main and try out the jib.  This is the original jib sail and she is a beauty!  An upside of Serenity seeing limited sailing time means the sails are in good to fantastic condition, considering they are over 25 years old.

Here is a quick video of us catchin’ the wind.  The video compression is making Serenity look chubby. She is not.  The voice you hear in the background is Randy.  What he is talking about I have no idea.

We sail Westward for a bit and the wind seems to be picking up.  Not good if we want to have a decent shot of getting Serenity back into her slip.  We drop the jib, and power up the engine.  We putter back to the marina.  Battling current and wind, Tim did a great job of getting Serenity back home.  He was mildly disgusted with his effort but he didn’t hit anything, no one fell in, and all hands lived to tell the tale.  I consider that a WIN.

We popped a bottle of bubbly, toasted with neighbors, then got some dinner.  Sunday Funday indeed.

Categories: Home | Leave a comment

Adios old, stinky crapper.

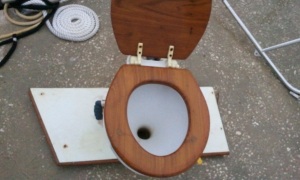
The crapper.  Officially, known as the head but in this case crapper is more fitting.  Stinky, loud, gnarly, STINKY crapper.  When I say stinky I’m not talking music festival stinky.  Think fully-loaded-Texas-outhouse-in-summer stinky.  You may ask, how about using air fresheners?  Silly goose.  We tried that and then it just smelled like the air fresheners peed everywhere.  Also, the bowl was household size which means you had to shuffle sideways to get to the sink versus just walking in.

The original crapper, which we’ll name OC, was electric.  That means to flush OC you opened the water inlet then pressed the on/off button.  When your deposit was whooshed through you would flip off the switch then turn the water inlet to the closed position.  While that sounds all modern and fancy it was not. OC’s motor was so loud it could raise the dead.  Flushing OC caused a cloud of noxious stinkiness to waft about for a good 15 minutes.  Awesome as Serenity is I was not going to be living in a floating Texas outhouse. No thank you.  This thing Has Got To GO.

Our friend Laura, her beautiful Benetau boat “Cybele” has a manual head made by Jabsco.  The first time I used Cybele’s head I was smitten.  Even though it’s a manual it’s super easy to use.  Flip the switch to the bowl fill position, give a few upward pulls on the handle to draw water in, do your thing, flip the same switch to the flush position, give the handle a few strokes and your deposit is quietly and cleanly disappeared.  When we returned to Serenity I proclaimed, hands on hips, that we were getting a Jabsco manual head.  Tim looks at me like the looney toons I am and says gopher it.

On a lark I check out Amazon to see if they have it.  Say what?!  There it is!!  The Jabsco 29090-3000 Marine Manual Twist and Lock Toilet.  I could not get out the credit card fast enough.  Also, since my super sweet sister shares her Prime membership with me 2 day shipping was Free!  Almost instant gratification.  Okay, right now I’m going to omit the part where I messed up the shipping address and got all wrapped around the axle about it.  Tim found it beyond hilarious but I’m still peeved about the whole thing.  Besides, Amazon and UPS fixed my error so it’s all good.

The head finally arrives – YAY!!!!  We eagerly open the box and gaze lovingly at the pristine, no smelly whiteness.  By this time Tim has purchased some stuff called Starboard to construct the new base for the head to sit on, which in turn sits on a platform.  The platform is necessary since that’s how the hoses are routed to and fro.  I guess the best way to describe Starboard: it’s plastic plywood.  You can saw it, sand it(sorta), drill it, route it, etc…  One odd thing about this stuff is it will melt if your saw or drill or whatever power tool gets too hot.  That didn’t happen to Tim, but our dock neighbor Mathias told us he’s experienced meltage.  Eeeps.  I’m sure many, many penguins died in the making of this product and for that I am sad, but for use on a boat it is unparalleled. Sorry penguins, you know I love you.

The day comes for the removal of OC. Rejoice!  Tim and I gird our loins for a stink-fest when we pull off hoses and remove OC.  I thought we’d be gagging the whole time but nothing of the sort happened.  Hooray!  Tim hustles OC off the boat and onto the dock.  IMMEDIATELY the boat stops smelling like an outhouse.  It’s an olfactory miracle.

OC on the dock

OC on the dock, still attached to original platform top

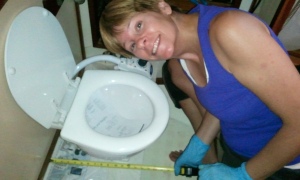
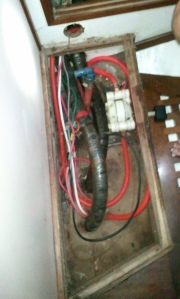
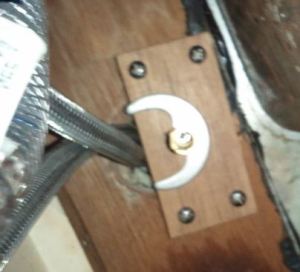
I desperately wanted us to do this right the first time so we palaver at length about measurements, position of the new head, is there enough angle for the lid, do we keep the salt water on/off lever(yes, as a safety precaution), hose routing, affixing the head to the Starboard, the sit test, all that good stuff.  Tim goes off to cut the Starboard.  I get down to business prying/scraping off the old and busted cladding of the platform, sanding the plywood base, and general preparation of the platform.  Oh yeah, and in the middle of all this fun we replaced the foot pump for the fresh water for the sink.  Bam!

Measuring for the top of the platform.

Measuring for the top of the platform.

The innards of the platform; with foot pump.

The innards of the platform; with old foot pump.

Time to check out the fit of the Starboard piece for the platform.  It fits perfectly.  High Five!  Tim drills holes for the bolts, then we caulk the base of the head to the Starboard.  Gotta let that dry a scoatch before bolting the head down tight to the Starboard.  While that’s curing Tim putters about.  I eyeball the outlet hose going to the Y valve.  Not a pretty sight.  Over the years it appears the accidentally flushed t.p. has gone from a paper based product to something entirely different.  It’s now more like a t.p. fossil.  A hose that should be around an inch internal diameter as been Jurassic Park’d down to about a 1/2″, raggedy-ass opening.

Crapper exit pipe - before.

Crapper exit pipe – 145 million years B.C.

No wonder the poor pump for OC was working so hard.  Yeesh.  At least it didn’t stink.  Small favors.  I bust out the long nitrile gloves and an assortment of scraping/chipping/scouring/defossilizing tools and get to work.  About 45 minutes later and the T-Rex t.p. has been conquered and I’ve managed to wrestle my anal retentive self into submission.  It’s good enough; the hose doesn’t have to be perfect.  Time for head and hose installation.

Crapper exit pipe - after.

Crapper outlet pipe – after.

Tim and I maneuver the head, now securely bolted to the Starboard, into the head, and place it on to the platform.  Hee HEE!  It’s so beautiful!  Look at that fit.  After a few more admiring seconds we crouch down to install attack the hoses.  Son of a biscuit, the hoses are TIGHT.  We bust out the heat gun.  YIKES!  Too much heat!  The main hose that attaches to the outlet pipe, it goes all Wicked Witch of the East – I’m MELTING!  Tim and I look at each other.  Is it salvageable?  Yep, looks like it re-formed itself once it cooled down.  Whew.  Gentle now with the heat…  Back and forth and QUICK!  SHOVE it onto the outlet pipe.  Lots of grunting from Tim, and wiggling, and grunting and shoving and it’s finally ON.  Clamp.  Final check.  Done.  Now for the smaller hoses.  They are just as feisty as the large hose.  Blerg!  Tim has a lightbulb moment and sends me to fetch the liquid dish soap.  He slathers some on the pertinent hose parts and after some additional coaxing via the heat gun those hoses finally get attached, clamped, and done.

The moment of truth. We turn the salt water seacock to ON.  No hoses pop off.  Miraculously no leaks.  A test sit.  Solid.  A test fill.  A test flush.  SUCCESS!!  The new head is fully operational and it looks FANTASTIC!  Tim puts in a few screws to secure the platform to the base and we close the books on this project.

I cannot express how happy I am to ditch OC and have a brand new head.  Choirs sing.  The angels weep.  Here it is, in all its no smelling glory:

Serenity's new head!

Serenity’s new head!

In conclusion, the project I thought would be one of the more treacherous, smelly, curse inducing, blood spilling ones turned out to be not so bad after all.

Categories: Home, Projects | 1 Comment

The Galley Faucet

The original galley faucet was a Moen, sprayer All in One thing.  It’s the kind of faucet in tons of homes and probably in a lot of boats too.  The first week we were on Serenity it worked fine, then as the days progressed the flow turned to a trickle.  I’ve seen babies pee with more pressure than our faucet had.  We checked the water pressure and it was good.  Cleaned out the tiny screen on the faucet. No help.  We decided the works were jammed up in the faucet hose and there was no way to fix it.  Time for a brand new faucet.  Oh, and the other thing that drove me batty… the hot and cold sides were reversed.  I mean, it’s not that hard.  There are only 2 hoses.  Mark them before you install.  Sheesh.  Okay, back to the matter at hand.

We trekked to The Home Depot to see their offerings.  While I like Moen products for home use I didn’t want a similar faucet, fearing the same issue would occur down the line.  We checked pretty much every faucet and nothing matched what we needed; measurement and aesthetic wise.  What’s a girl to do?  Quick, to the Internet!  After searching to and fro I landed on the Scandvik “Nordic” faucet.  It seemed ideal; tall spout that would reach both sides of the sink, tall enough to put a pot under, single lever control, sleek looks, and good price thanks to http://www.defender.com.  I eagerly awaited its arrival.

It shows up and I carefully remove it from the box.  It’s heavy which is a pleasant surprise.  With no fingerprints, no water spots and no soapy residue it’s very very shiny.  Another no?  No instructions.  Hmmm.  Well, okay, no big deal.  We’ve installed plenty of faucets before.  But wait, what’s this?  I look at the bottom of the faucet and Scandvik went some funky, C clamp, threaded post thing versus the threaded all the way around, cinch it up tight to the underside of the counter method.  What what??!!

New galley faucet

New galley faucet. Who doesn’t like that new faucet smell!

Galley Faucet Connector Thingy

Galley Faucet Connector post thingy.  Say what?

Initially we installed it with just the C clamp and post thingy.  No go.  The post thingy caused a pivot point so you couldn’t turn on the faucet without the whole thing tipping towards you.  We pondered options.  Giant washer?  No.  Wire threaded around the post then screwed to the underside of the counter.  Maybe….  Then of course Tim comes up with brilliant plan.  Use a block of wood, with a hole drilled through to accommodate the post, then 4 screws to the (thankfully wood and not Corian) underside of the counter.  The result: a super stable faucet.  We smooshed some of the handy dandy butyl tape under the faucet for waterproofing, and we’re just about there.  Now to the hose installation.  Dum da DUUUUMMMM!

Faucet underside - installed.

Faucet underside – installed.

As per the online specs I needed 1/2″ NPS-F fittings.  Huh?  After futilely buying and trying 2 different fittings, and dousing the underside of the galley sink twice due to the fittings, well, not fitting, we were stumped.  Frustration!!  Tim decided to try the same thing we did for the head sink.  A fitting that is barbed on one end for the water hoses and threaded on the other for the faucet hoses.  Not elegant or pretty but it works great.  With the water hoses finally hooked up – in the correct way no less – we flipped on the water pump.  No water spewing from the fittings.  YAY!  We turned on the faucet.  After the baby piss pressure from yore the faucet was practically Niagara Falls.  With a final double check tightening of the hose clamps we were done with the faucet installation.  Hooray running water!  May I present our new Galley Faucet in all its chromed out goodness.

The Faucet

The Faucet

Categories: Home, Projects | Leave a comment

Oh fridge, how you vex us.

Refrigeration on a boat.  A blessing and a curse.  Blessing when it works (98% of the time), and CURSING when the 2% happens.  This is a perfect example of how the best laid plans for getting projects knocked out gets derailed when shit like this goes down.  This fridge, it’s been a source of previous befuddlement due to its perceived finickiness.  It doesn’t help that we possess pretty much zero knowledge about refrigeration in general, much less boat fridges.  Now, it’s not really the fridges fault.  The last few times it acted like a moody teenager was due to battery issues. Being a 12V system if you don’t have sufficient juice to power the thing than fuhgetaboutit.  The fridge may act nice for a while, but then it decides play time is over and it goes home with its ball.

This particular go round was a legitimate part failure.  Tim had come to Texas for bidness and family time so luckily the fridge was pretty empty when he departed.  We both return on the 25th; landing late and arriving at the boat around 1:30am.  NOT the ideal time for a fridge to crap-out.  Actually, not an ideal time for ANYTHING except a Family Guy marathon or sleeping.  My friend Jennifer, her Mom says nothing good happens after midnight and that’s the truth.

Back to our tale of friggy woe.  Tim opens the fridge and instead of being greeted with chilliness there is the dreaded warmth.  This is when the cursing commences.  Switches are checked and flipped, stuff is poked.  Nothing.  By now it’s 2am and we say F it, let’s go to sleep.  Next morning Tim is up and at ’em, doing the gross work of removing soggy foodstuffs and wiping down the interior.  I scrub the teak grates clean.  I learned from last time I cleaned the fridge to mark which grate goes where.  Yeah, they look the same but silly rabbit, they are not the same. Tim reads up, does some tests with the ohmmeter, pokes more stuff, reads some more.  I do some pay the bills work so after my initial flurry of help I’ve pretty much checked out on this project.

In the quarterberth sits the compressor for both the fridge and freezer.  We never bothered to have the freezer plates installed so the freezer compressor’s just been sitting there.  They are the same brand so Tim does more reading.  Yep, the “electronic units” are swappable.  Sweet.  Well, shit, how do you get the thing off?  More reading.  Instructions are followed.  I flop into the quarterberth to offer my “expert” opinion.  After some gentle pushing, then some gentle crowbarring with a screwdriver I ask Tim, hey, what’s this screw here?  He says, I dunno, there’s no mention of a screw.  Me: There’s a screw here. Tim: No screw is mentioned.  Me: I bet this screw needs to be loosened.  Tim: There is no mention of a screw.  Me: Yes, I realize there’s no mention of a screw but there it is nonetheless.  Tim: Lemme see.  Tim flops into the quarterberth and finagles the screw loose.  YAY!!  The unit (Hee hee. Unit.) easily pops free.  The units are swapped out in about 5 minutes.  Like magic the fridge comes back to life. Happy dance!!  Working refrigeration.  Testify!

A trip to the Publix.  The fridge is restocked. We have returned to the land of the civilized.

The freezer compressor?  I guess that’ll just sit there until we finish the other 995.5 projects that need to be done.

On another completely unrelated note I de-crumbed the stove top today.  We have a 4 burner propane stove and by some sort of boating miracle all the igniter thingies work except for one.  The igniters are a super simple thing/design so it annoys me that one doesn’t work.  I ignite the other burners to understand what the heck happens.  Awright, looks pretty straightforward.  Not expecting very much I take a very high tech cleaning tool, and by high tech I mean a toothpick, and start scraping off stove detritus around the igniter and gas portlet.

Stove igniter

Stove igniter

La la la la la la, I try the burner.  Ker-pow!  It lights!!  Holy schmokes, we’re cookin’ with gas!  Literally, we are cookin’ with gas.  I give it a couple more starts and it works like a champ.  Who knew the little thing you stab Lil’ Smokies with could also fix a propane stove. Suck it MacGyver!

Categories: Home, Projects | Leave a comment

Foot pumps

Foot pumps.  I heart them.  They require zero power – well, other than your leg – and they easily provide fresh and salt watery goodness.  Serenity has fresh and salt water foot pumps in the galley and a fresh water one in the head.  All 3 worked, however the “return” motion wasn’t happening.  I would occasionally use them because I have a prehensile big toe so I could pincer the lever and pull it back up.  I also find using the pumps enjoyable because using them harkens back to my youth to summers spent in Colorado when we had to fetch water from the community, hand operated pumps, a la Little House on the Prairie.  Fun/nostalgia factor aside the pumps are important because if we lose ALL power at least we can pump up some fresh water, plus this project would give me a nice sense of accomplishment.

I decided to take out the salt water pump in the galley first since that one receives zero use.  I grabbed my tools, must have headlamp, flashlight, knee pads, towels, then I paused a second.  I asked Tim, hey, is there some sort of pump or something I should shut off before I take this pump out?  He looks at me like I just fell off the turnip truck.  He says, yes, you might want to consider closing the salt water sea cock so, ya know, you don’t flood the boat.  Sage advice. Yes, now is the time to call me a dumbass and roll your eyes.  I’ll give you a moment for that.

Sea cock closed I commenced removing the pump.  2 clamps later, hardly any swearing, banging my elbows and head only a few times, the pump is liberated.  I thought, maybe I can repair it since it works fine; other than the foot lever doesn’t go back up by itself part of the program.  Never working on a pump like this before I’m pretty sure I took out ALL the screws.  After a quick looksee it became apparent the pump couldn’t be salvaged.  The lever is forged from one piece of metal and it had broken in 3 places.  Bummer.

Foot pump guts

Foot pump guts

Broken lever pieces

Broken lever pieces

These pumps, being original, the input is on the right side and the output is on the left.  (You can see the input and output in the guts picture above).  I scoured the All Knowing Internet trying to find that configuration.  Denied.  That config is (of course) no longer done.  Nowadays the in and out are on one side – right or left.  I found a good deal on www.defender.com for Whale Gusher Mk3 Galley Pump and ordered 1 right and 1 left; not knowing which would be the better option come installation time. Also taking into account the fresh water pump in the galley is located directly to the right of the salt water one.  Also not know knowing which configuration would be best in the head.

We decided to go with the right side pump for the galley because by pointing the pump input directly downward it was perfectly positioned over the input hose; thus just manhandle the input hose onto the pump input, clamp, done.  The output hose was over yonder but by using a piece of hose, a barbed connector thingy and an elbow connector the output hose got hooked up a-okay.  Check the hoses are connected, clamps are tight, hoses are routed nicely so no pinching or bunching, cross my fingers and open the salt water sea cock.  Yay!!  No leaks and the pump works like a charm.  But wait, the pump-venture isn’t over.

The original pumps were taller than the new ones so the new ones didn’t sit on the floor.  We can’t just leave them loosey-goosey so I grab a piece of spare teak wood, cut  to size and stick under the pump.  Four screws for the base and boom, the new pump installation is complete.  Some test pumps.  Oooooo.  Ahhhhh.  It works like a champion.

Tim installed the fresh water pump in the galley – using a right input pump, in case you’re a curious sort, and of course it works perfectly.  So far my experience with Whale pumps as been excellent.  They are very good, well built, sturdy pieces of equipment.  Now I can foot pump to my hearts content.  Hooray!

Categories: Home, Projects | Leave a comment

Dorade Boxes and Cowl Vents

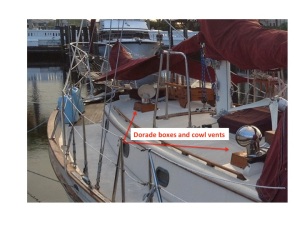
On Serenity, as with most sailboats, we have cowl vents to help get airflow into the cabin.  The vents swivel 360 so you can position them to grab the breeze.  Our cowl vents are stainless and sit on top of a dorade box.  The box is there to help minimize water getting into the cabin via the vent, and in case any water does come in, the boxes have an opening on the side so water may escape.  Our dorades are made of teak and of course they needed some TLC.  One needed some gakked up teak replaced and all needed the old varnish stripped off.

Dorade's and cowls on boat

Dorades and cowls on boat

I was looking forward to this project because unlike projects that require crawling around on the floor and sticking my arm in tiny places, this one involved wood, outdoors, the use of the heat gun, red paint, and pretty-fying Serenity.  Anything that involves pretty-fying I’m down for.

To replace the gakked up teak we got some new from Teak Hut in Sarasota (LOVE that place). Tim cut the new piece, then some planing, sanding, more planing, final sanding.  Et voila.  The piece fit perfectly.  Glue.  Clamp.  Done.  Mega kudo points for Tim for matching the grain direction.  My anal retentive self thanks you!

Now for stripping.  *cue bow chica wow wow music*  Fortunately we did this project on a day that was overcast and a little bit breezy so the warmth from the heat gun was delicious versus hellish.  What seemed to work the best: heat gun on high, about 4 inches away from the wood, some back and forth motion to get the wood and varnish hot, but not set it on fire, then use the scraper.  When done correctly the scraping action was easy and the varnish just flaked right off.  Heat.  Scrape.  Repeat.  Give it the once over with 120 grit sandpaper and those bad boys are ready for varnishing. Talk about satisfaction to watch the old varnish vanish and the nice teak emerge.  FYI – I love teak.  On top of being beautiful I’m pretty sure it has magical powers.

dorade boxes

Naked and still partially dressed dorade boxes.

Okay, so I have to admit, we’re stalling about doing the varnishing.  There seems to be a jillion different ways to varnish and a million different opinions and I don’t want to do it “wrong”.  Dumb, I know, because the dorade boxes are the perfect project to get our feet damp when it comes to varnishing.  I promise to post some pics and the process when we varnish the dorade boxes.

The cowl vents: these poor things were so pathetic looking.  We both spent an afternoon chipping and scraping and sanding and acetoneing to rid the vents of all traces of paint and gunk.  I taped off the openings and this is where my anal retentiveness served me well.  Taping something round using straight edged tape?  That’s a lot harder than it looks, yo.

Cowl vents-before and after scraping

Cowl vents-before and after scraping.
Ready for painting.

Lucky for me I had a “spray booth” in the form of an empty dock box.  I lined it with newspaper and got to spraying. Tip: make sure to cover the entire exterior of the vent with tape or newspaper because paint will magically leap onto the unprotected metal.  Arg!  I technically did just 2 coats of paint but I’m hoping with overlap and back and forth spraying it’s closer to 4 coats.

Ta-da!  Are they bright red?  Yessiree bob, but I like it.  Our color scheme will be navy canvas with cream colored decks and top sides and I think the red gives it a jaunty pop of color.

Cowl vent - shiny and new

Cowl vent – shiny and new

Categories: Home, Projects | Leave a comment

A whole mess o’ projects

Hello everyone!

It’s been a while since our last blog but we’ve been busy little campers!  Below is a list of projects we tackled while I was in Florida over Thanksgiving.  I may not do an individual posting for each project but I wanted to list out what we accomplished. I’m very happy we managed to knock these out over the Thanksgiving break.  In no particular order:

* Removed dorade boxes, stripped off old varnish, repaired the teak.  Varnishing still to be done.

* Cleaned and repainted cowl vents

* Removed old mattress and replaced with 3” foam and 3” memory foam topper

* Removed old head and replaced with new

* Replaced 2 foot pumps (fresh water in head, salt water in galley)

* Replaced galley faucet

Stay tuned for individual postings, and as always, we greatly appreciate your interest and support.

Christine & Tim

Categories: Home, Projects | Leave a comment

Update: Fun with portlights

12/14/14 update:

Okay, so an update to this blog.  A year after doing the portlights I can’t 100% recommend the butyl tape.  Why?  Because the repeated tightening down of the portlights causes the butyl tape to leak/ooze/squish out.  Also, the positive aspect of it being malleable and slightly tacky(no, not in a polka dot with stripes kind of way) is a con in this application since it collects dust, whenever you touch it, it gets squished down, and it just doesn’t look super polished.

So, I think if I ever have to do this again I would try the Skkaflex but I would let it dry before cleaning off the excess.  The reason it’s so hard to work with is, it is gross cleaning up the excess; plus you go through a crazy amount of paper towels working with the stuff.  Better off to let it dry, then just cut off/away the excess.

Anyway, I’m still happy with how the portlights look and function, but live and learn.

Happy projects!

Happy Saturday crew!  Let me tell you the tale of the portlights.  Get comfy because this is a long one.

As you have already surmised, Serenity is a more, er, mature sailboat.  With that comes the ARGGGG factor – like sink faucets that only dribble water – to awesomeness like bronze portlights.  Bronze portlights are rarely put in sailboats anymore, the trend being stainless.  I’m a big fan of stainless but these portlights fit the ambiance of Serenity and I really wanted to give them some TLC to bring them back to the superstars they are.

More than just making the portlights pretty we needed to replace the old and crumbly gaskets = leaks, and the laminated safety glass.  The glue had started to deteriorate making the glass look grubby.

We contacted Gulf Coast Auto Glass here in Bradenton and for $16 a piece they cut us 9 pieces of glass.  We also searched out gasket material.  Lemme tell you, that was a challenge.  The gasket channel is 5/16″ wide x 1/4″ deep and that’s not really something you can run to Home Depot and grab a roll.  I thought, O-ring material would be a good choice.  I only bought 10 feet, enough for 3 portlights because I wasn’t sure how much of a pain it would be to install.  Round material in square channel.  Not the best idea, but it was a starting point.  (We wound up finding 5/16″ x 1/4″ neoprene gasket which we ordered by the foot.  It worked a LOT better.  No cutting down required.)

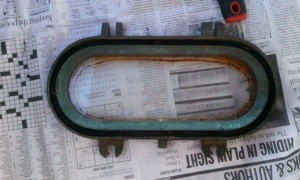
Here’s a pic of what I was dealing with, grunge wise.  This one was the worst off as far as munge than some of the others, but ironically it cleaned up the best.  I started with the portlight in the shower stall figuring if I screwed it up and it leaked than the damage was contained to an area designed to get wet.

Grungy portlight

Grungy portlight.

There was no way I was going to pull the body of the portlight out in order to clean it.  Re-bedding the portlights was NOT on the agenda.  Not this go round anyway.  So, how does one clean a vertical object with liquid, of which is subject to gravity = running down the sides?  After some cyber-skulking on various boat blogs, websites, etc…  I landed on vinegar as the cleaning agent.  Cheap and non-toxic.  Bonus.  I made up a paste of flour, salt and vinegar.  I slathered it all over the portlight and skipped away to tackle the glass removal.

Let me tell you, the caulking they used to bed the glass is naaaasssssty!  Tim loathingly refers to it as Tayana Black.  As in, the Black Hole of Sticky, Get Everywhere Goo.  Via 2 bolts I removed the portlight body from Serenity.  The bolts and dogs were put into to a bath of vinegar to soak. Using our trusty 5in1 tool I scraped out the gasket material from the channel.  Of course it crumbles all over the place, leaving me with not only a gooey mess but crusty gasket boogers to boot.  I quickly learn stay out of the wind lest the crumbly crap fly everywhere.  Old gasket out, I unscrew the 4 small screws for the retaining ring.  Easy peezy.

Portlight minus gasket, old glass still in.

Portlight minus gasket, ready for old glass removal.  The brown stuff?  That’s the glue from the laminated glass.

Body separated from ring

Body separated from ring

Freeing the glass from the body was pretty easy.  Scrape away some gasket material, wedge the 5in1 tool in between the body and glass, gently pry the glass away. In a couple minutes I now had the glass out of the body, however it was still affixed to the retaining ring.  Liberating the glass from the retaining ring would prove trickier.

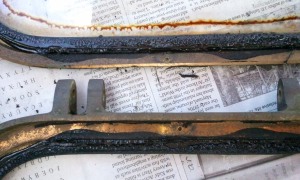
Close up of Tayana Black Goo. You can also see the glue for the laminated glass.

Close up of Tayana Black Goo. Glass is out of the body but still in the retaining ring.

My first couple of attempts in retaining ring glass removal resulted in the glass cracking, which resulted in smaller pieces of (pointy!) glass loitering about.  One good side to the gasket material being so gooey is the pointy pieces of glass could not escape the embrace of the goo and go cause mayhem.  Slicing of the dermis is very, very low on my list of things I want to happen.  And by low I mean never.  Also, my anal retentive self wanted one piece of intact glass, not some cracked, busted up shit.  I quickly learned using the pointy end of the tool to pry resulted in cracked glass.  Using the flat part of the tool and slow and steady got the job done easier and faster.  By sliding the tool all the way around the ring and gently prying, the ring and glass parted ways.  The glass was freed from the ring in one piece – hooray!  Here are a couple of pics of me doing it right.

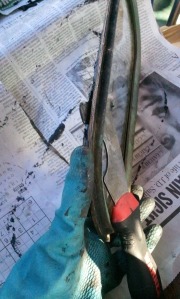
Tool working on getting the gasket material to release its gooey grip.

Working on getting the gasket to release its gooey grip.

5in1 tool separating glass from ring.

5in1 tool separating glass from ring.

Using the 5in1 tool I scraped away the Tayana Black Goo.  The key was to work in small areas, wiping the tool frequently.  It wasn’t the big blobs of gasket and goo that got me, it was the sneaky little pieces that smeared. Being diligent and frequent wiping of the tool was key.  Once I had scraped off as much goo as my patience would allow I turned to chemicals.  Acetone and green Scotch-Brite and LOTS of elbow grease.  It pretty much went: Acetone. Scrape scrape.  Acetone acetone.  Scrape.  Acetone.   Scrape.  Acetone.  Repeat repeat repeat repeat.  Finally, the body and ring were gasket and goo free(well, as much as they could be after 25 years).  A quick rinse with water and wipe down and time for cleaning.

Let me take a mo and tell you that cleaning the body AFTER goo removal is key.  After 5 portlights I realized, hey, there is goo getting on your newly cleaned portlight.  If you clean AFTER goo removal that is much more sensible.  Live and learn.

Let’s go back to the vinegar and paste that have been stewing on the portlight.  Great.  It is hard as a rock.  I squirt with water.  No help.  I squirt with vinegar.  No good.  Gotta bust out the Scotch-Brite pad, and talk about scrubbing.  This was good in theory, not good in practice.  It just dried out too fast in the 80 degree “heat”.  Time for Plan A.5.  Plan A.5 is now a 2 part program.

First part is to use a liberal application of Brasso, new Scotch-Brite pads frequently and lots of scrubbing.  Good shoulder workout!  Since bronze is a pretty soft metal hard scrubbing is not advised, but a firm application and making sure to use fresh Scotch-Brites worked wonders.  With the first layer of grunge removed it was time for Part 2: Vinegar.

The below not so great pic shows the portlight with the paper towels soaked in vinegar.  My dock neighbor Dianna did her portlights the same way, but she used long cotton swabs instead of paper towel.  About every 45 minutes I would give the towels a spritzing of vinegar.   The key is to keep the towels wet so the vinegar can work it’s magic, plus at least 4 hours soak time.

Portlight covered with paper towel, soaking in vinegar.

Portlight covered with paper towel, soaking in vinegar.

While the portlight is soaking, the body and retaining ring get the same Brasso then vinegar treatment.  These were easier to do since I could handle them while Brasso’ing, then lay them flat, spritz, cover with paper towel, spritz again to soak, then cover with a plastic bag which prolonged the life of the vinegar.  Again, at least 4 hours doused in vinegar really cut the grime.

The final step to beautification was getting that final layer of grime off.  Spritz with vinegar, scrub with ScotchBrite(swap out frequently so you don’t work so hard), spritzing, ScotchBrite, repeat until grime is vanquished.  A triumphant rinse with fresh water and the portlights positively shine.

Wish I had started this whole project with the Brasso/vinegar double punch.  I can only guess the Brasso cuts most of the dirt, corrosion, whatever, and the vinegar bats clean up; baseball reference and pun intended.  YAY RED SOX!

Shiny clean!

Shiny clean!

On the home stretch now!  Let’s button these bad boys up.  The first portlight we did we used Sikkaflex (caulk specific to use with glass), however talk about a mess!!!  We spent more time wiping up Sikkaflex than bedding the portlight.  Another solution was needed.  After more cyber-skulking we came across a website where a couple talks about using Butyl tape to bed the exterior part of their portlights.  Well, if they could use it for that let’s try it with the glass.  People, I am now a huge fan of butyl tape.  It has lots of applications, is easy to use, doesn’t stink, can be handled without gloves, and the slight film it left on the glass is easily removed with, you guessed it, vinegar.  I applied the butyl tape to the body, set in the glass, then pressed and pressed and pressed to get a good seal.

Butyl tape on body, sans glass

Butyl tape on body, pre glass

Butyl tape on the retaining ring, and more pressing.  Back in went the 4 little screws, then used a sharp razor blade to cut away the extra tape.  A wipe or two to get rid of finger prints and butyl tape film and the portlight has new glass and is sparking clean – HAPPY DAYS!

The final easy step was the neoprene gasket.  I measured it by placing it in the channel, cut to length, some contact cement on both parts, then carefully inserted the gasket into the channel.  More pressing to seat it, then I installed it back on the boat.  I cinched down the portlight so the gasket could get even, firm pressure for the contact cement to really work.

Here is the finished product.

Close up of cleaned portlight

Close up of cleaned portlight

Portlight - TA-DA!!

Portlight – TA-DA!!

We had a pretty good rainstorm this morning and not one portlight leaked.  Whew.  On top of this project being good for Serenity it really made the interior look special.  Function AND beauty.

For their help I would like to thank:  The couple gallons of vinegar, the couple rolls of paper towels, Brasso, butyl tape, 5in1 tool, countless hard working ScotchBrites, knife with sharp razor blade, flat bladed screwdriver, clamp, Acetone.

Hope everyone has a great weekend, and thanks for reading!

Categories: Home, Projects | 8 Comments

Blog at WordPress.com.